If you stream from PS5, Xbox, or Switch and want more control over your setup, a capture card is usually the easiest way to do it properly. This post tells you what it does, what specs matter, and which AVerMedia cards are worth it at different budgets.
Okay wait, what is a capture card?

Here’s what no one tells you at the start: your console and your PC don't naturally talk to each other for streaming.
A capture card is basically the bridge between the two. It takes the video signal from your console and sends it to your PC, so you can stream or record it properly without relying on clunky built-in tools.
Specs that matter and the ones that don’t
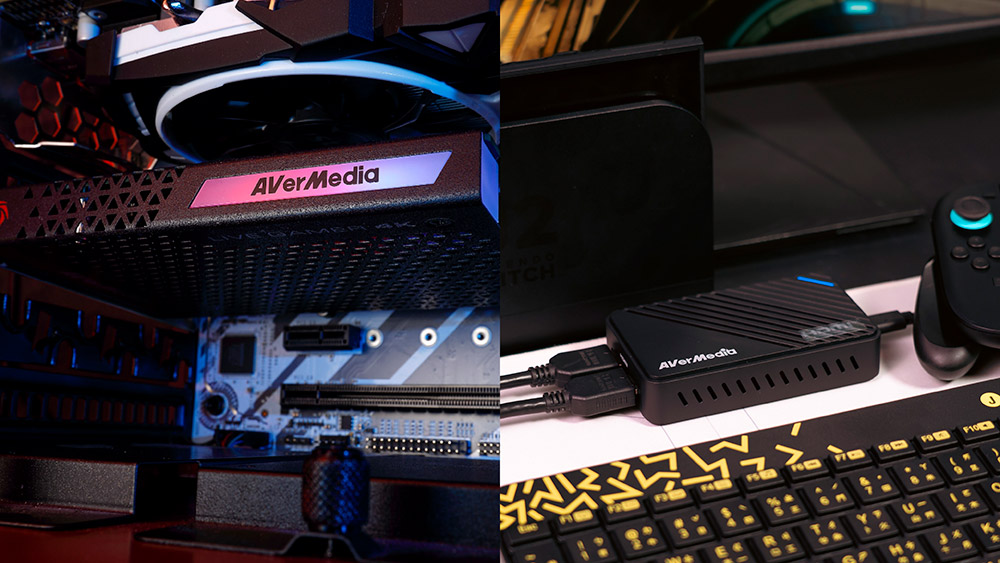
Internal vs. External, which one's for you?
External cards plug into USB, so they’re simple, portable, and basically no stress. They’re great for beginners or for streaming from a laptop.
Internal cards slot into your PC motherboard, take a bit more setup, but usually give you better quality and lower delay. They’re best if you’re using a desktop and are okay with a bit of hardware work.
For 99% of first-time streamers, start external. You can always change later.
Which Card is Actually Worth Your Coffee Money?
Under $100: The StreamLine MINI+ (GC311G2) is a practical entry-level option for beginners who want 1080p60 without overspending.
$100–$150: The Elite Go (GC313Pro) is a more flexible option for people who want portability and extra convenience, especially for on-the-go setups.
Over $200: The Live Gamer ULTRA 2.1 (GC553G2) is better suited to advanced users who need higher-performance features.
ELENA’s honest take: If you’re just starting, you do not need to overspend. A reliable entry-level card is usually enough to get going.
If you are still not sure which one fits your setup, you can also check AVerMedia’s product selector here:
https://www.avermedia.com/event/product_select/
The Fast Setup Guide
Most people overthink this for weeks and then feel silly when it takes 15 minutes. If you can plug in a toaster, you can set up a capture card. Here’s what you actually do:
- • Step 1: HDMI from console to card.
Plug your console or camera HDMI into the "IN" port on the card. - • Step 2: HDMI from card to TV.
Run a second cable from the "OUT" port to your TV or monitor, and that's your passthrough. - • Step 3: USB to PC, then OBS.
Connect the card to your PC via USB. Open OBS, add a "Video Capture Device" source, select your card. That's it, you're live.
Grab a reliable card and just start. Your first stream won't be perfect, but at least it won't be laggy.
Coming next: I’m digging into the different types of capture cards.
FAQ:
Q: I'm just doing Mukbangs and Lifestyle streams, do I really need this?
A: If you’re using a real camera, such as a Sony ZV-E10 or a DSLR, then yes. A capture device is what brings that video feed into your PC. Depending on your setup, options like BU113G2 or Elite Go may be worth considering.
Q: Will a capture card work with Nintendo Switch or Switch 2?
A: Yes, but it depends on how you play. For a docked setup, a standard HDMI capture card works well. If you want a more portable setup without carrying a dock, a more flexible option like the GC313Pro may make more sense.
Q: Do I need 4K?
A: Not necessarily for streaming. 1080p60 is still a solid standard for most live streaming. 4K can be useful if you also want cleaner recordings for platforms like TikTok or YouTube Shorts.